When designing for the web, it’s important to always keep accessibility in mind. Accessibility means making sure your website or application is accessible to everyone. For example, audio content isn’t accessible for people with hearing difficulties, but if you add a transcript it can be. Text with low contrast might be less accessible for people with vision trouble, but by increasing the contrast you can make it easier for them read. And so on. The “how” of making accessible web pages is a incredibly broad topic, but what I want to touch on here is the “why”.
It’s easy to make excuses for not designing with accessibility in mind. “How is anyone supposed to remember all these guidelines. It seems like a disproportionate amount of work for such a small number of people.” Now, it’s true that designing an accessible site takes some additional effort. But you might be surprised to find out just how many users have some sort of accessibility issue.
If you haven’t read it before, I encourage you to check out the great article, An Alphabet of Accessibility Issues, by Anne Gibson right now. The article illustrates the huge variety of forms that accessibility issues can take. Accessibility affects the lives of all sorts of people.
And that’s not all. The fact is, making a site accessible improves the experience for everyone. Just going back to the earlier examples, adding transcripts for audio doesn’t just help people with hearing difficulties. Now your content is easier to access for people who can’t turn on their speakers where they are, people who don’t have time for audio, and people who would just prefer to read. And improving the contrast of your text can make the site more comfortable to read even for users with perfect vision.
Ruby’s map function is great when you want to transform every item of a list in the same way. Here’s the syntax from the Ruby docs:
map { |obj| block } → array
map iterates through an enumerable object, and returns an array using the return value of the code in block for each item in the enumberable. The obj is whatever the enumerable object supplies for iteration. For an array it will be a value in the array. For a hash it will be a key-value pair.
map is a non-destructive function. It leaves your original object alone and returns a new transformed object. You can transform your items in all sorts of ways. It’s great when you have a set of data that’s just a step or two away from what you want.
Add one to every item.
[0, 5, 9].map {|value| value + 1}
#=> [1, 6, 10]
Get the first ten square numbers.
(1..10).map {|n| n * n}
#=> [1, 4, 9, 16, 25, 36, 49, 64, 81, 100]
Capitalize every string.
["hello", "world"].map {|word| word.to_s.upcase}
#=> ["HELLO", "WORLD"]
Simple Pig Latin with map.
["ruby", "is", "fun"].map {|word|
    vowels = ["a","e","i","o","u"]
    if vowels.include? word[0]
        word + "yay"
    else
        word[1..-1] + word[0] + "ay"
    end
}
#=> ["ubyray", "isyay", "unfay"]
You can also use map on hashes. Just remember map always returns an array, so you have to do a little bit of extra work to change a hash to a new hash with map.
Map always returns an array, even when applied to a hash.
balances = {"Amy" => 20000.0, "Bill" => 4000.0, "Carol" => 6000.0}
interest_rate = 1.01
balances.map {|_, value| value * interest_rate]}
#=> [20200.0, 4040.0, 6060.0]
When you return key-value pairs, you still get an array.
balances.map {|key, value| [key, value * interest_rate]}
#=> [["Amy", 20200.0], ["Bill", 4040.0], ["Carol", 6060.0]]
You can convert an array of key-value pair arrays to a hash using .to_h
balances.map {|key, value| [key, value * interest_rate]}.to_h
#=> {"Amy"=>20200.0, "Bill"=>4040.0, "Carol"=>6060.0}
I hope these examples helped you to better understand what the map function does and how to use it.
Just got this in the mail last weekend.

It’s a little wifi enabled programmable chip thing with a cloud service behind it.
You can program it from a web based interface. You can make it publish and subscribe to cloud events and use the API to connect it to your own web apps. But my favorite part is the IFTTT support. It makes connecting it with all sorts of existing stuff super fast and easy.
I only played with it for like 15 minutes so far, but with the help of some example code and the IFTTT phone app I was able to get this killer app working.

Can you guess what the button does?
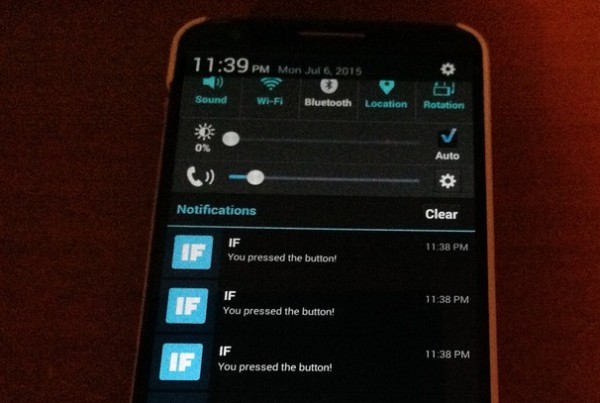
Amazing, right?
About a month ago, I finished a minimalist pixel animation web app I was working on called Super Micro Paint. It lets you create 4 frame, 2 color, 32x16 pixel animations really quickly. Then you can turn your creations into gifs that resemble things like LCDs, LEDs, plastic toy blocks, and more. I didn’t make any sort of detailed post when I launched it, but here’s something now.
Remember Tamagotchi?
I wanted to make it this really minimalist thing without being trivial. A big inspiration here came from Tamagotchi virtual pets. The original Tamagotchi only had a 32x16 pixel, 2 color display, but it was still able to show all sorts of wonderful little animated creatures. I used those same dimensions for Super Micro Paint.
And then there was Mario Paint. I spent a lot of time with it when I was a kid and I loved how easy it was to make animations. Actually, I had an idea early on to make SMP more Mario Paint-like, with all sorts of fun sounds and animated screen clear effects but I decided to keep things simple.
Surprisingly, I had not heard about the Etch-a-Sketch Animator until this was almost finished. I mean, literally one day before I made the first complete version of this public, I saw the Etch-a-Sketch animator on Wikipedia and said ‘huh.’
An Old Cheap LCD Toy
I wanted to simulate the experience of an old LCD toy from an alternate history 1990s. Maybe it was buried at the bottom of a box in the closet that never noticed before. Maybe you found it in a mysterious thrift shop that you could never manage to locate again. Anyway, I wanted it to really look and function just like a cheap old LCD display. This meant I could only add as many icons as would fit on the screen. And each icon (or pixel) could only be on or off. There was no room for shades of grey or overlapping display elements.
Sticking firmly to this idea sometimes limited the features I could include. For example, since I couldn’t use transparency or gray pixels, I couldn’t include an onion skinning mode. And I had to implement the indicators for dragging out lines and shapes by blinking a shadow of the pixels. I also didn’t want to include out of place things like ‘hyperlinks’ or ‘tooltips’, so I made a manual in the style of an instruction sheet just you might find with an old toy.
I don’t think these limitations were a bad thing. Whenever I considered new features I could ask myself, ‘could an old cheap LCD toy do this?’. It really helped me to focus on a straightforward UI and a consistent experience.
I did cheat a bit on the export application. It’s a separate page with a pretty standard web app UI. But I think of it as something you do on your computer after uploading the data from the toy. I mean people had PCs in the 90s. The even had USB cables toward the end. Maybe there was a cult community around the toy and they made their own applications. I’m not sure exactly when it started, but I sort of have this whole mythology built up in my head around this thing.
Too Many Dots
This was my first real attempt at seeing what Angular.js could do and I learned a lot about what NOT to do with Angular.js. I originally made the main LCD display as a grid of DOM elements with Angular.js directives that applied a class of ‘on’ or ‘off’ to each pixel based off of data in an array. Long story short, letting Angular handle the state of 512 individual pixel elements was much slower than I had hoped for, so I switched to using HTML canvas for drawing instead. It’s a bit of a shame because if I could have kept it like that, it would have been super easy to add some CSS transitions to simulate a slow pixel response time as the pixels faded from on to off.
Not Enough Frames
Since everything in Super Micro Paint is done on the client side, and I didn’t want to host any data, I included a feature to push gifs to an external image host so people share could share their creations more easily. I wanted to pick an external service that did video conversion so users could share to sites that don’t like raw gifs, like Twitter.
Originally, I used gfycat. But at the last minute I discovered that their video conversions sometimes had wonky looping when playing back in Chrome. The video would skip over the last frame very quickly before looping. It looked bad. One frame missed is a big deal when you only have four frames. I tried tweaking the speed of the gif, and finally got something that worked in Chrome, but that version had a problem in other browsers instead. I don’t know if you need special encoding settings to make a four frame video that loops smoothly in all browsers, but I guess it must be a tricky edge case. Anyway, I tried imgur and their video conversions seemed to loop correctly. So I switched to imgur, which has been working fine so far.
Links
I recently updated videojs-transcript, a videojs plugin that automatically generates an interactive transcript from video captions, to work with video.js 4.12.
There was a big overhaul of how text tracks for captions work in vjs 4.12. The methods on text tracks changed to be more in line with the HTML 5 Text Track API. The details here will probably only be interesting if you are trying to make a plugin for video.js that uses text tracks, but here are some of the changes I ran into.
Text tracks are now contained in a TextTrackList instead of a plain array.
I was using .foreach() to iterate through the tracks. I had to change to a for loop. No problem.
No more .load() method on text tracks.
I want videojs to load and parse the subtitles for me without me switching the currently active track. Now, to load up non-active tracks, I need to change the .mode property on the track I want to 'hidden'. The track is then loaded but not displayed. Cool.
No more 'loaded' event or .readyState property to tell when a track is loaded.
This part is probably the hackiest workaround. I have to use a setTimeout() loop to check that a track’s .activeCues property isn’t null. The .activeCues property should be null until the track is loaded. Not ideal but it works, and video.js itself currently uses something similar to load chapter titles.
So here’s the old way I used to load text tracks:
var getTrackAndDoSomething = function(track) {

    // A function to call when the track is ready.
    var doSomethingWithTheTrack = function() {
        /* do fun stuff with the ready track here */
    });

    // .readyState() == 2 means the track is loaded.
    // If the track isn't loaded...
    if (track.readyState() !==2) {

        // Load the track
        track.load();

        // Do stuff when we get the 'loaded' callback.
        track.on('loaded', doSomethingWithTheTrack);

    // If the track is loaded, do stuff now.
    } else {
       doSomethingWithTheTrack();
    }
};
And here’s the new way:
var getTrackAndDoSomething = function(track) {

    // .activeCues should be null until the track is loaded.
    // If the track isn't loaded...
    if (!track.activeCues) {

        // don't hide an already showing track.
        if (track.mode !== 'showing') {

            // setting .mode to 'hidden' makes videojs load and parse the track.
            track.mode = 'hidden';
        }

        // try again until track is loaded.
        window.setTimeout(function() {
            getTrackAndDoSomething(track);
        }, 100);

    // If the track is loaded, do stuff now.
    } else {
        /* do fun stuff with the ready track here */
    }
};